
Introduction:
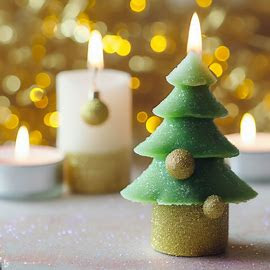
The holiday season is filled with warmth, joy, and the delightful aroma of Christmas trees. What if you could capture that enchanting scent and bring it into your home? With a DIY Christmas tree scented candle, you can do just that! In this blog post, we'll guide you through the step-by-step process of creating your very own Christmas tree scented candle. Get ready to infuse your home with the nostalgic fragrance of the holiday season and enjoy the cozy ambiance it brings.
Christmas is a time of joy, love, and celebration that is eagerly anticipated by people around the world. It is a season that brings families and friends together to create lasting memories and cherish traditions. From decorating homes with twinkling lights and ornaments to exchanging thoughtful gifts, Christmas fills the air with a sense of warmth and generosity. The holiday is marked by festive gatherings, delicious feasts, and the joyous sound of carols being sung. It is a time to reflect on the year gone by, express gratitude, and extend kindness to others. Whether you celebrate with religious significance or embrace the secular spirit of the season, Christmas is a time of hope and renewal. It reminds us to cherish our loved ones, spread goodwill, and embrace the true spirit of giving.
Materials Needed:
Before we dive into the candle-making process, gather the following materials:
- Candle wax: Choose a high-quality candle wax suitable for container candles.
- Candle wicks: Select pre-tabbed wicks that fit the size of your candle container.
- Candle container: Pick a glass jar or tin that will serve as your candle holder.
- Essential oils: Get scents such as pine, fir, cedar, or any Christmas tree fragrance of your choice.
- Candle dye or color chips (optional): If you want a colored candle, choose dye or color chips in shades that complement the holiday theme.
- Wax melting pot or double boiler: Use a dedicated pot or a heatproof container for melting the wax.
- Thermometer: Use a thermometer to monitor the temperature of the wax.
- Stirring utensil: Choose a heatproof spoon or stirring stick to mix the wax and fragrance.
- Candle adhesive: This will secure the wick to the bottom of the container.
- Decorative elements (optional): Consider adding dried pinecones, cinnamon sticks, or holiday-themed decorations to enhance the festive look.
Creating Your Christmas Tree Scented Candle:
Follow these steps to create your very own Christmas tree scented candle:
- Prepare your workspace: Find a clean, well-ventilated area to work in. Protect your surface with newspaper or a heat-resistant mat.
- Secure the wick: Attach the wick to the bottom center of your candle container using a small amount of candle adhesive. Ensure the wick is centered and straight.
- Melt the wax: Follow the instructions provided with your candle wax to melt it using a wax melting pot or a double boiler. Monitor the temperature using a thermometer and heat the wax to the recommended melting point.
- Add fragrance: Once the wax has melted, remove it from the heat and let it cool slightly. Add a few drops of your chosen Christmas tree essential oil or fragrance, adjusting the amount to your preference. Stir gently to distribute the fragrance evenly.
- Optional: Add color (if desired): If you prefer a colored candle, add a small amount of candle dye or color chips to the melted wax. Stir well until the color is thoroughly incorporated.
- Pour the wax: Carefully pour the scented wax into the prepared candle container, taking care not to disturb the wick. Leave a small amount of space at the top for future adjustments.
- Optional: Decorate the candle: If you wish to add a festive touch, place dried pinecones, cinnamon sticks, or other decorative elements onto the surface of the melted wax before it solidifies. Press them gently to ensure they stick in place.
- Allow the candle to set: Let the candle cool and solidify completely. This process may take a few hours, so be patient.
- Trim the wick: Once the candle has fully hardened, trim the wick to a suitable length, leaving about half an inch above the wax surface.
- Enjoy your Christmas tree scented candle: Light your candle and let the cozy aroma of Christmas trees fill your space. Bask in the warm glow and festive ambiance it brings.
Safety Precautions:
While creating your Christmas tree scented candle, keep these safety tips in mind:
- Follow the instructions: Read and follow the instructions provided by the candle wax manufacturer for safe handling and usage.
- Heat precautions: Handle hot wax with caution and ensure you have appropriate heatproof gloves or mitts to protect your hands.
- Ventilation: Work in a well-ventilated area to avoid inhaling excessive fumes.
- Fire safety: Never leave a burning candle unattended and keep it away from flammable materials. Always place the candle on a heat-resistant surface.
Conclusion:
Creating your own Christmas tree scented candle is a delightful way to infuse your home with the enchanting aroma of the holiday season. With a few simple materials and a dash of creativity, you can craft a personalized candle that not only adds a festive touch to your decor but also fills your space with the nostalgic scent of Christmas trees. Embrace the joy of DIY and enjoy the warm ambiance created by your handmade candle. Spread the holiday cheer and share this wonderful DIY project with family and friends, allowing them to experience the magic of a Christmas tree-scented home.