Introduction:
Are you a fan of beautifully crafted writing instruments? If so, creating your own resin pen can be a fulfilling and creative endeavor. Resin pens are not only functional but also serve as unique works of art that showcase your personal style. In this blog post, we will guide you through the process of creating a stunning resin pen from scratch. Whether you're an experienced resin artist or a beginner looking for a new project, this step-by-step guide will help you create a one-of-a-kind pen that will make a statement every time you use it. So, let's dive in and discover the joy of crafting your own resin pen!
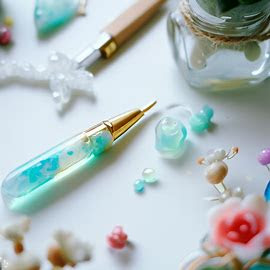
A resin pen is more than just a writing instrument – it is a work of art. Made from a combination of transparent casting resin and various colors or additives, resin pens offer a stunning visual appeal that sets them apart from traditional pens. The process of creating a resin pen involves pouring and curing the resin mixture, resulting in a solid and durable body that can be shaped and polished to perfection. The beauty of resin pens lies in their uniqueness, as each pen showcases intricate patterns, swirls, or even embedded materials like glitter or wood shavings. Whether you prefer a sleek and elegant design or a bold and vibrant statement piece, resin pens offer endless possibilities for customization. Not only are resin pens a joy to use, but they also make fantastic gifts for friends and loved ones who appreciate the beauty of handmade craftsmanship. With a resin pen in hand, your writing experience becomes not only functional but also a visual feast for the eyes.
Materials Needed:
Before we begin, gather the following materials:
- Pen kit: Choose a pen kit that includes the pen barrel, pen cap, and pen mechanism. There are various pen styles and designs available, so select one that suits your preference.
- Resin: Opt for high-quality, transparent casting resin. This will be the main material used to create the body of the pen. Select resin colors that resonate with your artistic vision.
- Resin dyes or pigments: These are optional but can be used to add unique colors and effects to the resin.
- Pen mandrel: A pen mandrel is a tool used to hold the pen blank securely while turning it on a lathe. Ensure you have the appropriate mandrel for your pen kit.
- Lathe (optional): A lathe is a machine used for shaping and smoothing the pen barrel. While not essential, it provides more precision and control in creating the pen.
Creating Your Resin Pen:
Follow these steps to create your very own resin pen:
- Prepare your workspace: Set up a well-ventilated and organized workspace. Cover your working surface with a non-stick mat or parchment paper to protect it from resin drips.
- Prepare the pen blanks: Cut your chosen resin colors into small pieces and arrange them inside the pen barrel. Experiment with different patterns, layers, or even mix in additional materials such as glitter or wood shavings for a unique look.
- Mix and pour the resin: Follow the instructions provided with your resin kit to mix the resin and catalyst thoroughly. Pour the resin mixture into the pen barrel, ensuring it fills all the gaps and covers the pen blanks completely. Remove any air bubbles by gently tapping the barrel or using a heat gun.
- Cure the resin: Allow the resin to cure according to the manufacturer's instructions. This typically involves letting it sit undisturbed for a specific period of time. Ensure the pen barrel is placed on a level surface during the curing process.
- Turning the pen barrel (optional): If you have access to a lathe, mount the pen barrel on a pen mandrel and secure it tightly. Use turning tools to shape and smooth the resin barrel, creating a sleek and polished finish. Take your time and work carefully to achieve the desired shape.
- Assemble the pen: Once the resin barrel is fully cured and shaped, follow the instructions provided with your pen kit to assemble the pen. Attach the pen cap, pen mechanism, and any other components according to the manufacturer's guidelines.
- Fine-tuning and testing: Inspect the pen for any rough edges or imperfections. Use sandpaper or fine-grit abrasives to smooth out any irregularities. Test the pen by retracting and extending the pen mechanism to ensure smooth operation.
Conclusion:
Creating your own resin pen is a rewarding and creative project that allows you to combine functionality with artistic expression. With a few materials and some dedicated craftsmanship, you can craft a pen that is not only a pleasure to use but also a visual delight. Whether you choose vibrant colors, mesmerizing patterns, or subtle elegance, the possibilities are endless when working with resin. So, embrace your creativity, follow the steps in this guide, and enjoy the satisfaction of writing with a truly unique and personalized resin pen that reflects your artistic flair and individuality.

